Argus Collectors Group
How to repair & clean a C3
Home
What's New?
Argus Reference Photographs
Argus Accessory Photographs
Argus Sales & Demo Items
Argus Instruction Manuals
Argus Sales Brochures
Prototypes
Argus Camera Surveys
Argus Books and Information
Modified Argus Cameras
Ask the ACG for Help
Join the ACG
Best of the ACG e-mail list
Related Links
ACG Member Photos
Argust Day
Argus World Argosy I
Argus World Argosy II

Edited & revised by James Schenken, 06/07/04


IMPORTANT NOTE:

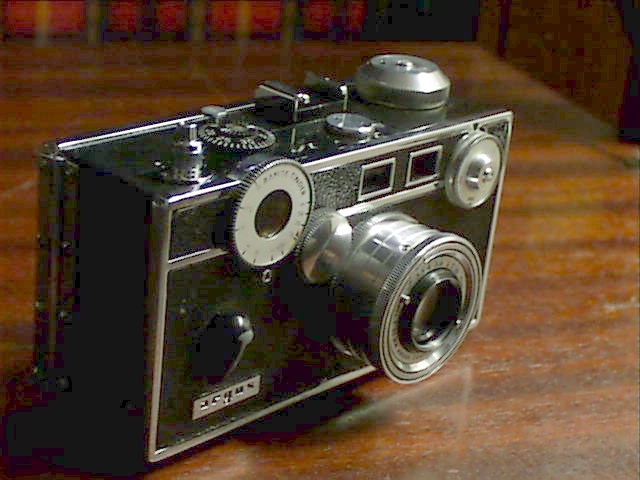
All information in this page and the following ones, are intended to help you keep your C-3 Brick camera in good running order.  Do not attempt to disassemble your camera if you do not have the manual skill to do that.  This information are given as is.  The author takes no responsibility if the use by anybody of these pages causes any damage to your camera.  I will try to be as exact as possible in describing the work operations, but keep in mind that Its YOU who hold the screwdriver!


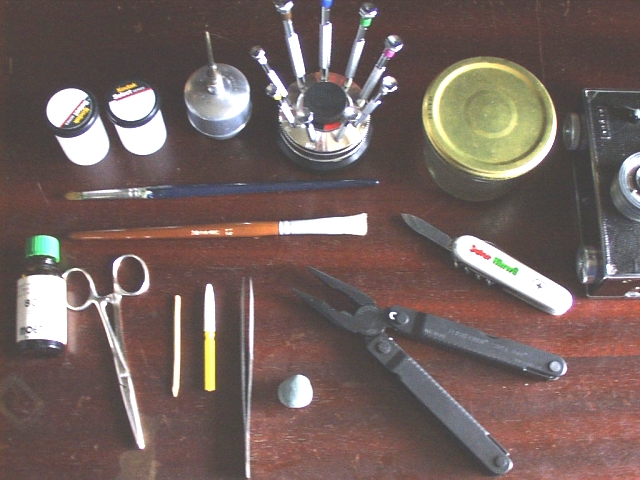
STEP 1 : Necessary tools

A good quality set of jewelers screwdrivers

Manual blower (to remove dust )

A set of precision pliers, tweezers.

Drop oiler (for lubricating small parts, shutters...) and oil cup

A glass cup with cover, you may use for clean big parts like shutters, buttons and all metal parts.

Compartment case for keeping separate the parts you remove (some 135 film containers do the same job ).

Some solvent (Ronsonol lighter fluid is fine) and brushes for cleaning metal parts, ear cleaning tips are so useful for viewfinders, wiping paper, cotton, pieces of cloth, oil and grease, a few wooden toothpicks ( fine for cleaning pinions ), a Swiss knife may be helpful.  A small amount of RODICO, the oil I use is the ref :8030 from Moebius (its an oil for clocks that works perfectly on cameras parts )

You can find tools and supplies to : http://www.tmpco.com/

I never worked with them, but have a complete catalog of horologic tools, oils and others that are of great use in camera repair.

tools.jpg

STEP 2 :Preparation

Remove lens, cocking lever, shutter speed button.

Moisten leatherette with solvent, wait a few minutes and gently remove it.  Remove the six screws holding the front plate to the camera.

Remove counter disk and rangefinder plate (3 screws), and carefully clean windows and mirrors, blowing dust from the mechanisms.

With brush and solvent, clean all old lubricants on moving parts and shutter blades.  Carefully wipe parts and allow to dry.

argusrepair1.jpg

STEP 3 : Lubricating

Lubricating the C3 is very simple, only a few moving parts, plenty of room to work.  Except for the film transport, the body is totally empty.

See pictures and put only a tiny drop of oil at each point.  NOTE: Do not lubricate the shutter pivot point as shown.  The oil will migrate to the blades of the shutter and interfere with its operation.

c3repair3-1.jpg
c3repair3-2.jpg

STEP 4:Reassamble, set rangefinder.

If need you may adjust the rangefinder, according to the year of C-3 you have in hand, setting differs slightly, most recent models are simplest.  But its a tedious task.

*For all models -do not forget to set rangefinder wheel to infinity.

rg01.jpg

*Older models : 2 small screws set mirror in horizontal and vertical.

rg03.jpg

Newer models : a large and smaller screw are used, turning the smaller one (2) adjusts the vertical and the larger screw (1) allows the mirror to move horizontally by slipping support back and forth.


IMPORTANT: The screws MUST be tightened gently.  When adjustment is complete, replace the cap.

rg02.jpg

STEP 5 : Final assembly

Clean and re-glue leatherette, clean and lubricate lens focusing ring, and mount lens on camera.

MAKE GOOD PICTURES WITH YOUR NEW C3!

cc02.jpg